144-pin SO-DIMM Installation Guide
IMPORTANT
PLEASE CONTACT A QUALIFIED TECHNICIAN FOR ASSISTANCE IN INSTALLING THIS PRODUCT IF YOU
ARE NOT FAMILIAR WITH DOING SO. ANY INSTRUCTIONS INCLUDED WITH THE PRODUCT ARE FOR
CONVENIENCE ONLY AND ARE NOT INTENDED TO BE ALL-INCLUSIVE.
144-pin SO-DIMMs are used in notebook computers.
Each SO-DIMM will contain a number of chips which will vary from
2 to up to 16. Along the edge of the DIMM, there will be gold
contacts on the front and back. These are often referred to as the
�pins� of the module. Along the connector edge, you will notice a
notch near the left of center. This alignment notch will help you
orient the SO-DIMM correctly into the socket.
Handling Memory DIMMs and Internal Computer
Components
Memory DIMMs, like most electrical components inside computers,
are susceptible to damage by static electricity. You should NEVER handle memory or computer parts if you
have any static electricity buildup. Before working with any sensitive electronics, be sure to touch the metal
casing of the computer first to ground yourself. If you have an antistatic grounding strap, it�s a very good
idea to use it while working with your computer. In addition to eliminating static discharge, DIMMs need to
be handled carefully. Avoid touching the metal contacts to help prevent future corrosion due to skin oils. Do
not drop, bend, or stress your DIMMs. Do not expose them to temperature extremes or high humidity.
Allowing your DIMM to become subject to such conditions may damage your DIMMs and will void your
warranty.
Installing Memory SO-DIMMs
Installing your memory SO-DIMM is a fairly easy process; however, before attempting installation, make
sure you
have all of these items to ensure your installation will go smoothly: 1) your new memory upgrade 2) your
notebook owner�s manual or technical manual 3) the tools that are necessary to open your case and access
memory slots 4) a work area in a low-static environment (i.e.-A laminated table surface in a non-carpeted
room), and an antistatic grounding strap, if available.
Memory SO-DIMM Installation:
1) With the notebook turned off and unplugged, remove the rechargeable battery. (Refer to your owner�s
manual)
2) Follow the manufacturer�s instructions to locate and gain access to the memory socket or sockets.
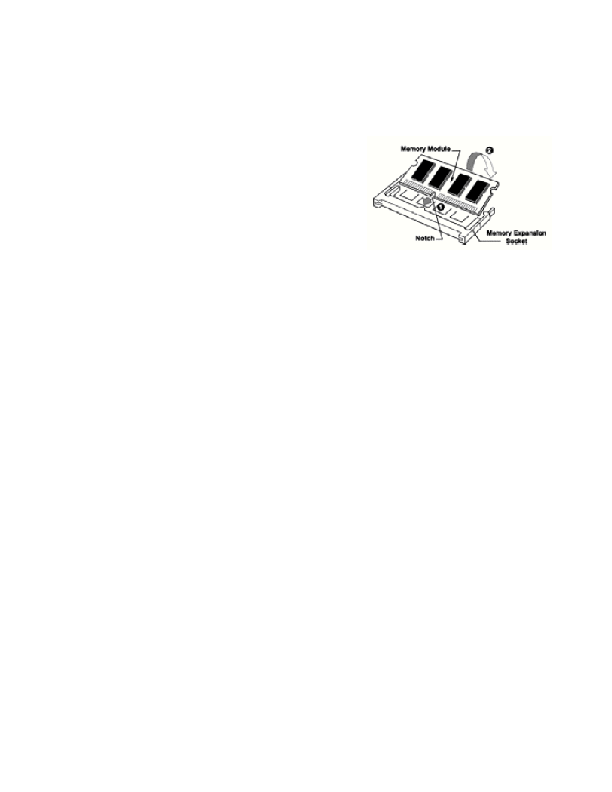
3) Your memory module and expansion socket are keyed. A small plastic bridge in the socket must align with
the notch in the module. The keyed bridge and notch insures that the module can be plugged into the
socket one way only.
4) Insert your memory module into the socket at a 30-45 degree angle. Make sure the notch and the module
are properly aligned.
5) Once the module is properly aligned in the socket, rotate the module downwards until the clips at each
end of
the expansion socket click into place. To remove a module from an expansion socket, place your thumbs on
each of the clips located on both sides of the socket, and press apart to the left and right away from the
module. The SO-DIMM module should spring upward. Remove it at the same angle it was inserted.
6) After installing your module or modules, close the computer; reinstall any cables that may have been
disconnected during the installation process; replace the rechargeable battery and plug in the AC power cord.
7) Turn on your computer and follow the instructions in your Owner�s Manual to configure the computer to
recognize the new memory.
MemoryUpgradeCompany